AAM Installation & Configuration
AAM Installation
EPAS can integrate with CyberArk AAM using two methods:
- Using a CyberArk Central Credential Provider, which relies on the existence of a CyberArk Central Credential Provider within the customer’s premises or;
- Using a Credential Provider (EPAS local service) deployed on the EPAS system, which directly connects to the CyberArk AAM Vault.
The Central Credential Provider, installed on an IIS service(s), offers the ability to retrieve passwords via SOAP web calls on any platform, using authenticated or authorized web calls. For more information on how to deploy and configure a Central Credential Provider, refer to the document labeled “Central Credential Provider Implementation Guide” for CyberArk Credential Provider installation.
The Credential Provider is automatically installed by EPAS during the configuration phase, and offers the ability to retrieve account credentials from a local service running on the EPAS system.
AAM Configuration
In order to integrate EPAS and CyberArk AAM the following steps are required:
- Defining the Application ID (APPID) and authentication details
- Provisioning accounts and setting permissions for EPAS access
Defining the application id (Appid) and authentication details
To define the Application, here are the instructions to define it manually via CyberArk's PVWA (Password Vault Web Access) Interface:
-
Logged in as a user allowed to managed applications (it requires Manage Users authorization), in the Applications tab, click Add Application; the Add Application page appears.
-
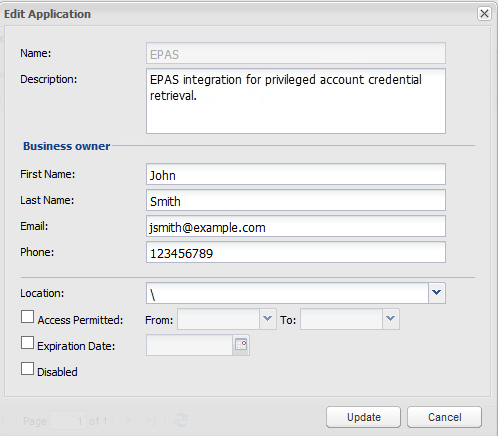
Specify the following information:
- In the Name edit box, specify the unique name (ID) of the application. In installations with a single EPAS deployment, it is recommended to use the "EPAS" application name.
- In the Description, specify a short description of the application that will help you identify it.
- In the Business owner section, specify contact information about the application's Business owner.
- In the lowest section, specify the Location of the application in the Vault hierarchy. If a Location is not selected, the application will be added in the same Location as the user who is creating this application.
-
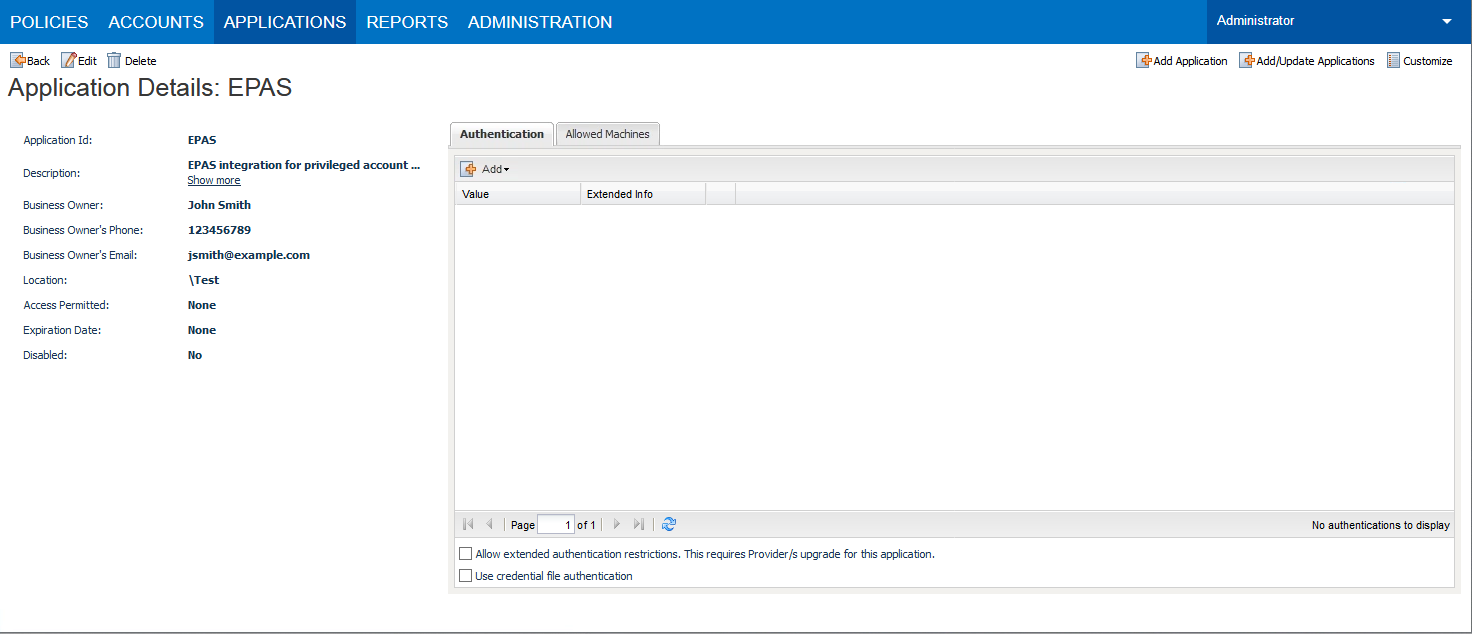
Click Add; the application is added and is displayed in the Application Details page.
-
In order to permit access for credential requests originating from the EPAS MASTER navigate to the Allowed Machines tab and click the Add action.
-
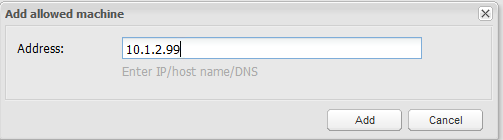
(Optional) Specify the IP address or hostname of the EPAS MASTER appliance, and click Add.
Note
This step is optional if the CyberArk AAM integration is using the standalone Credential Provider. When using Central Credential Provider, this step is required.
Note
It is recommended to use IP addresses in order to not rely on DNS resolution for authenticating credential requests, which can add additional overhead to the authentication time.
Provisioning Accounts and setting permissions For EPAS Access
For EPAS to be able to authenticate and audit passwords in systems secured and managed by CyberArk, the aforementioned accounts need to be provisioned in the CyberArk Password Safe(s).
For the application to perform its functionality or tasks, the application must have access to particular existing accounts, or new accounts to be provisioned in CyberArk Vault - Step 1.
Once the accounts are managed by CyberArk, make sure to setup the access to the EPAS application id (e.g. "EPAS") - Step 2.
-
In the Password Safe, provision the privileged accounts that will be required by EPAS. You can do this in either of the following ways:
- Manually - Add accounts manually one at a time, and specify all the account details.
- Automatically - Add multiple accounts automatically using the Password Upload feature.
For this step, you require the Add accounts authorization in the Password Safe.
For more information about adding and managing privileged accounts, refer to the Privileged Account Security Implementation Guide.
-
Add the Central Credential Provider user, as well as the EPAS application user / APPID (created under the Defining the application id (Appid) and authentication details section), as a member of the Password Safes where the application passwords are stored. This can either be done manually in the Safes tab, or by specifying the Safe names in the CSV file for adding multiple applications.
Note
When installing multiple Providers for this integration, it is recommended to create a group for them, and add the group to the Safe once with the above authorization.
-
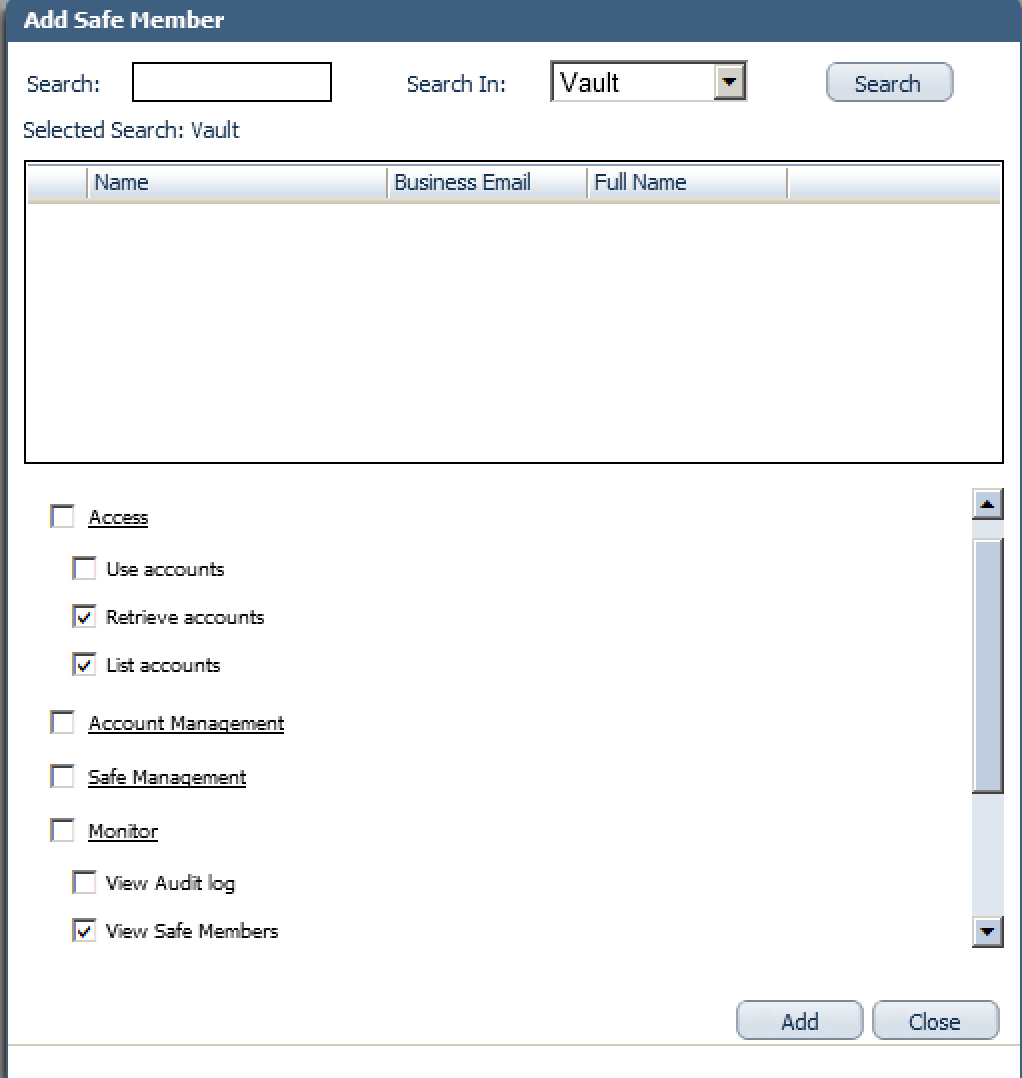
Add the Provider user as a Safe Member with the following authorizations:
- List accounts
- Retrieve accounts
- View Safe Members
-
Add the APPID user as a Safe Member with the following authorizations:
- Retrieve accounts
- If your environment is configured for dual control:
- In PIM-PSM environments (v7.2 and lower), if the Safe is configured to require confirmation from authorized users before passwords can be retrieved, give the Provider user and the application the following permission:
- Access Safe without Confirmation
- In Privileged Account Security solutions (v8.0 and higher), when working with dual control, the Provider user can always access without confirmation, thus, it is not necessary to set this permission.
- In PIM-PSM environments (v7.2 and lower), if the Safe is configured to require confirmation from authorized users before passwords can be retrieved, give the Provider user and the application the following permission:
-
For more information about configuring Safe Members, refer to the Privileged Account Security Implementation Guide.